Hey there, fellow food adventurers! Are you ready to dive headfirst into the world of seared ahi tuna? I’m not talking about just any old fish recipe; I’m talking about that melt-in-your-mouth, perfectly crusted piece of deliciousness that you’ve probably seen at fancy restaurants. Maybe you thought creating this amazing pan-seared tuna at home was too complicated? Well, I’m here to tell you – it’s not! With a few simple tricks and some good quality ingredients, you’ll be serving up restaurant-worthy seared ahi tuna in your own kitchen in no time. You’ll see that cooking perfectly seared tuna is easier than you think. Get ready, because this is going to be a tasty journey into the art of cooking seared tuna!
Print
Transform Your Kitchen: The Ultimate Guide to Perfectly Seared Ahi Tuna
- Total Time: 7-15 minutes
Description
A guide to making perfectly seared ahi tuna at home, covering everything from selecting the right tuna to searing techniques, serving suggestions, and troubleshooting.
Ingredients
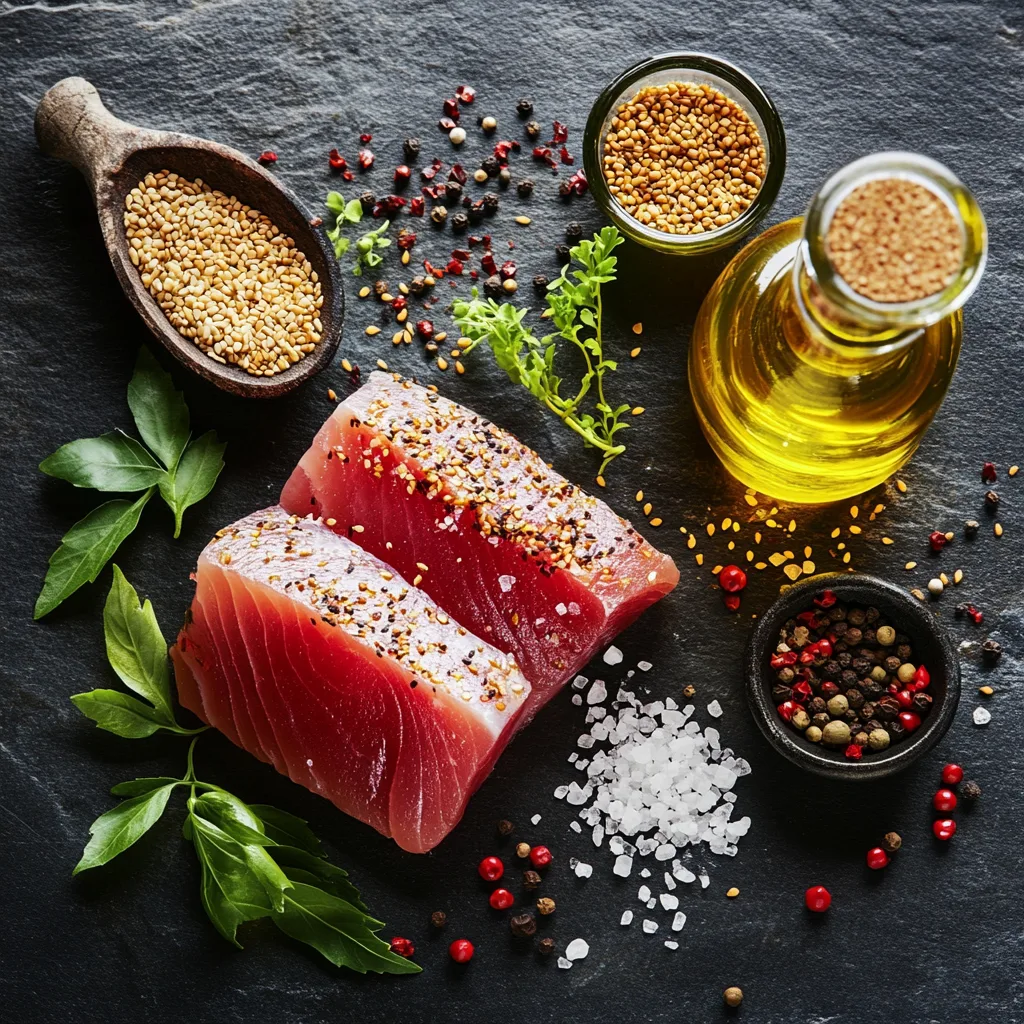
- Ahi tuna steaks (sushi/sashimi grade)
- High smoke point oil (refined coconut, avocado, or grapeseed oil)
- Coarse sea salt
- Freshly cracked black pepper
- Optional: Sesame seeds (white and black), red pepper flakes, garlic powder
- Optional Serving Accompaniments: Soy sauce, wasabi, pickled ginger, steamed rice, blanched vegetables, salad ingredients, sriracha mayo, ponzu sauce, lemon, oregano, feta, hummus, couscous, olive oil.
Instructions
- Prep the Tuna: Pat tuna steaks dry with paper towels. Season liberally on all sides with salt, pepper, and any other desired spices.
- Heat the Pan: Heat a pan over high heat until it is screaming hot. Add oil to the hot pan; it should shimmer.
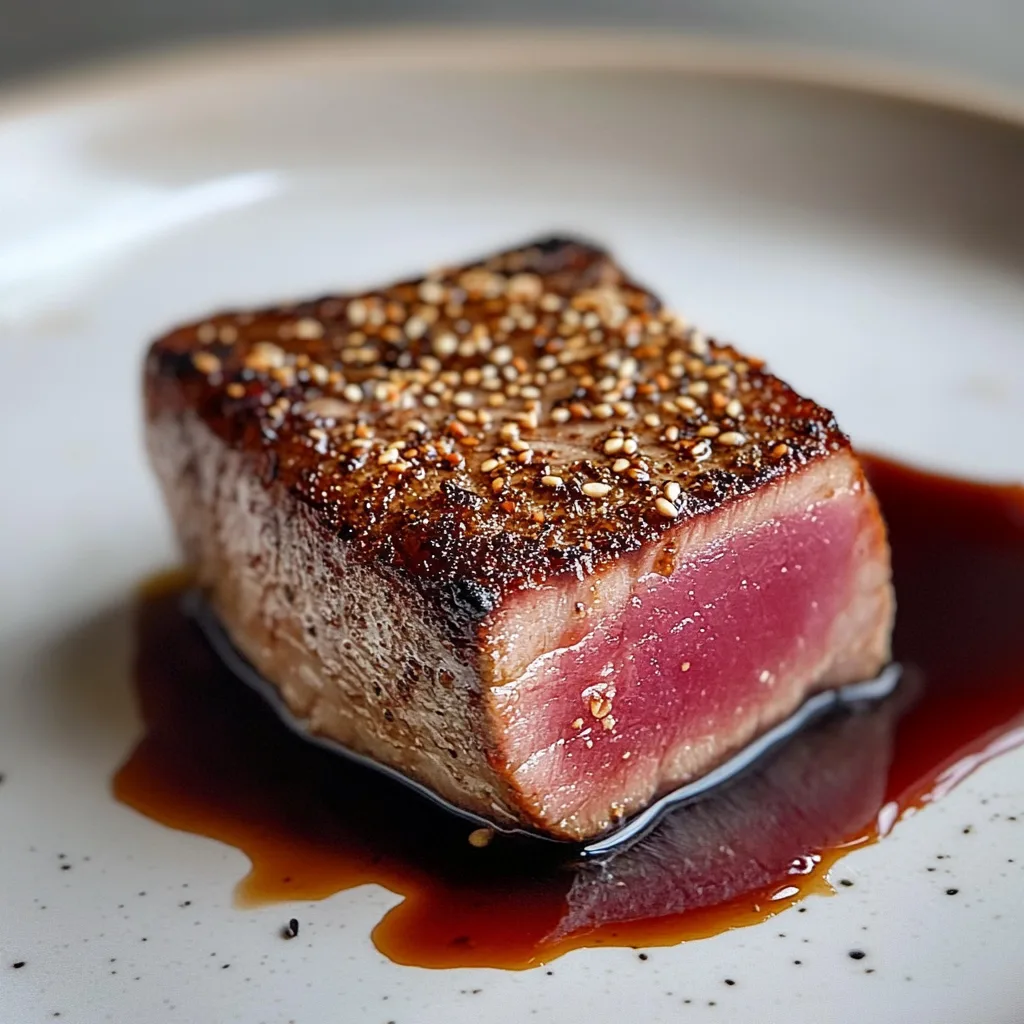
- Sear the Tuna: Carefully place the seasoned tuna into the hot pan. Sear for 30 seconds to 1 minute per side, creating a crispy crust while the center remains mostly raw. Sear in batches if needed, avoiding overcrowding.
- Check for Doneness: The tuna is ready when it has a crisp crust on the outside and the inside is still pink/red (rare to medium-rare).
- Serve: Serve immediately. Pair with classic sides like rice and vegetables, or get creative with salads or poke bowls. Add desired condiments and garnishes.
- Prep Time: 5-10 minutes
- Cook Time: 2-5 minutes
- Category: Main Course, Seafood
- Method: Pan-searing
- Cuisine: Global
Nutrition
- Serving Size: 4oz (113g) ahi tuna
- Calories: 130 – 150
- Sugar: 0g
- Sodium: 40mg – 60mg
- Fat: 0.5g – 1.5g
- Protein: 25-28g
Keywords: Seared Ahi Tuna, Pan-Seared Tuna, Seared Tuna, Tuna Recipes, Ahi Tuna Steak, Sushi Grade Tuna, Sashimi Grade Tuna, Quick Dinner, Healthy Recipe, Seafood, High Protein Meal, Rare Tuna, Mediterranean Flavors, Japanese Flavors.
Why Seared Ahi Tuna is a Culinary Game Changer
Okay, let’s be real. Seared ahi tuna is more than just a meal; it’s an experience. It’s like that one outfit in your closet that always makes you feel like a million bucks – it’s special. But what makes it such a culinary game-changer?
The Allure of the Seared Tuna Experience
Imagine sinking your teeth into a perfectly seared piece of tuna. The outside is crisp and seasoned to perfection, while the inside is a delicate, buttery soft. It’s a dance of textures and flavors that can elevate any meal. It is a simple yet refined dish that somehow manages to be both sophisticated and comforting at the same time. That’s the magic of seared ahi tuna!
Health Benefits Packed in Every Bite
Beyond the incredible taste, ahi tuna is a nutritional powerhouse. It’s loaded with protein, omega-3 fatty acids, and essential vitamins. This isn’t just something yummy you’re eating; you are giving your body some real goodness! So, while you’re enjoying every bite of your seared masterpiece, you can feel good knowing you’re also doing something great for your health. It’s a win-win situation.
Selecting the Perfect Ahi Tuna: A Crucial First Step
Alright, so you’re stoked about making some seared ahi, right? But hold up! Before you even think about grabbing that pan, we need to talk about the most important part: the tuna itself. Choosing the right ahi is like choosing the right canvas for a painting. It makes all the difference.
Fresh vs. Frozen: What’s the Real Deal?
This is a big one. Many people think fresh is always better, but with tuna, it’s not quite so cut and dry. High-quality frozen ahi can actually be superior to “fresh” tuna that may have been sitting around for days. Flash freezing at sea preserves the fish’s texture and flavor perfectly. If you’re buying fresh, make sure it looks and smells great ( more on that later). If you are using frozen, just ensure to thaw it properly in the fridge overnight for the best results.
Understanding Grades and Colors
When you’re shopping, you will likely see different grades of ahi tuna. The highest grade is often called “sushi grade” or “sashimi grade”, which means it is safe to eat raw. Look for vibrant, deep red or pink color. Avoid anything that looks pale, dull, or brown as this can indicate the tuna is old. This step is so important. Your safety is in choosing the right grade!
Sustainability: Making Responsible Choices
I really want us to think about where our food comes from. As conscious consumers, we should choose our fish wisely. Look for tuna that is sustainably caught. Certifications from organizations like the Marine Stewardship Council (MSC) or labels indicating pole-and-line caught tuna can help you make eco-friendly choices. Let’s enjoy our amazing meal while also being mindful of our oceans.
Essential Ingredients for Seared Ahi Tuna

We’ve got the perfect piece of ahi tuna, now let’s talk about what else we need to make this dish sing. The beautiful thing about seared ahi is that you don’t need a ton of fancy ingredients. Simple, high-quality ingredients can truly make this dish incredible.
The Power of High-Quality Oil
The oil you use is key for getting that perfect sear. You’re looking for an oil with a high smoke point, something that can handle the heat without breaking down and getting bitter. My go-to options are refined coconut oil, avocado oil, or even grapeseed oil. Just like you wouldn’t put cheap gas in a luxury car, don’t skimp on the oil for your tuna. Trust me, your tastebuds will thank you.
Seasoning: Simple is Often Best
When it comes to seasoning seared ahi tuna, I believe less is more. We don’t want to hide that lovely tuna taste! Coarse sea salt and freshly cracked black pepper is my first choice and the ideal starting point. You can use a grinder or a pinch of salt if you need to. Salt and pepper help enhance the natural flavors of the fish without overpowering it. If you want to go beyond just that, I’ve got you covered for that in a bit.
Optional Extras for Added Flair
Okay, for those of you who love to kick things up a notch, here are a few of my favorite optional extras. A sprinkle of sesame seeds (both white and black for contrast) adds a lovely nutty flavor and a visual pop. You can also add a pinch of red pepper flakes if you want a bit of heat. Feel free to experiment and find what your palette prefers. I love adding a tiny bit of garlic powder. It brings a subtle depth of flavor, just be careful not to overpower the delicate tuna flavor.
Step-by-Step: How to Sear Ahi Tuna Perfectly Every Time

Now, for the moment you’ve been waiting for: the actual searing of the ahi tuna steak! Don’t worry, it is not as complicated as you might think. With a few simple techniques and a bit of patience, you’ll be a seared ahi tuna master in no time.
Prep Like a Pro: Before You Even Heat the Pan
First things first, you need to pat your tuna dry with a paper towel. This is a vital step because moisture can prevent the tuna from getting that beautiful sear. Get your oil and seasonings ready to go and place them next to the stove. It is very important to be organized, this way you won’t have to scramble around when your pan is hot. Now, you will want to season all sides of the tuna liberally with your salt, pepper and any other spices you are adding.
The Art of the Sear: Heat and Timing
Heat your pan over high heat. You want it screaming hot. Once your pan is hot, add your oil. The oil should start to shimmer, and then it’s time to add your tuna. Carefully place the seasoned tuna into the hot pan, and you will hear that beautiful sizzle, which means you’re doing it right. Allow the tuna to sear for about 30 seconds to 1 minute per side. Don’t overcrowd the pan. If you have multiple tuna steaks, sear them in batches. You are looking for a crisp crust on the outside while the inside remains mostly raw.
Achieving the Perfect Doneness
The best part is figuring out exactly how you prefer your tuna to be. If you’re looking for a rare center, a quick sear is all you need. If you like it a bit more cooked, add a little bit more time to the searing. The great thing about tuna is that is great even when slightly undercooked. The key is to not overdo it! The inside will still be vibrant and pink/red when you are done, and the outside should be a crispy brown.
Common Problems and Solutions When Searing Ahi Tuna
Okay, let’s be real, even the most seasoned cooks sometimes run into little hiccups. Searing ahi tuna isn’t always a walk in the park, so let’s go over a few of the common pitfalls and how to dodge them.
The Dreaded Overcooked Tuna
Ah, the overcooked tuna—a tragedy that no one wants to experience. The main culprit here is usually cooking the tuna for too long. Remember, we want the inside to be tender and mostly raw, so timing is crucial. My advice: err on the side of undercooking rather than overcooking. Also, if you have a thicker piece of tuna it’s best to turn down the heat a bit. And again, make sure you are using a screaming hot pan.
Uneven Searing: Getting That Perfect Crust
That beautiful, evenly browned crust is a telltale sign of a perfectly seared tuna. Uneven searing usually happens if your pan isn’t hot enough, or if your tuna is too wet. Also, moving the tuna around too much while it’s searing will prevent the crust from forming. The trick is to be patient, resist the urge to flip too soon, and be sure that your pan is piping hot before you even think about adding the tuna.
Flavorless Tuna: Boosting the Taste Profile
So, you’ve got a beautifully seared piece of tuna, but it tastes kind of… meh? That’s a bummer, but don’t panic. This typically means that the fish wasn’t seasoned adequately, or it could also be that the tuna wasn’t fresh. Be generous with your seasonings. Don’t be afraid to experiment with different spices, or add a bit of citrus!
Serving Suggestions: Elevate Your Seared Tuna Experience

Alright, your tuna is perfectly seared and you are drooling already! Let’s talk about how to serve it to really take things to the next level. Presentation is key, right? We want to make this meal unforgettable!
Classic Pairings: What Goes Well with Seared Tuna?
Seared ahi tuna is incredibly versatile. You can’t go wrong with a side of steamed rice and some blanched veggies like asparagus or edamame. Soy sauce, wasabi, and pickled ginger are my go-to classic accompaniments. A simple drizzle of soy sauce will add some umami, and a tiny bit of wasabi will add some heat. These traditional pairings are classics for a reason!
Creative Serving Ideas: Beyond the Ordinary
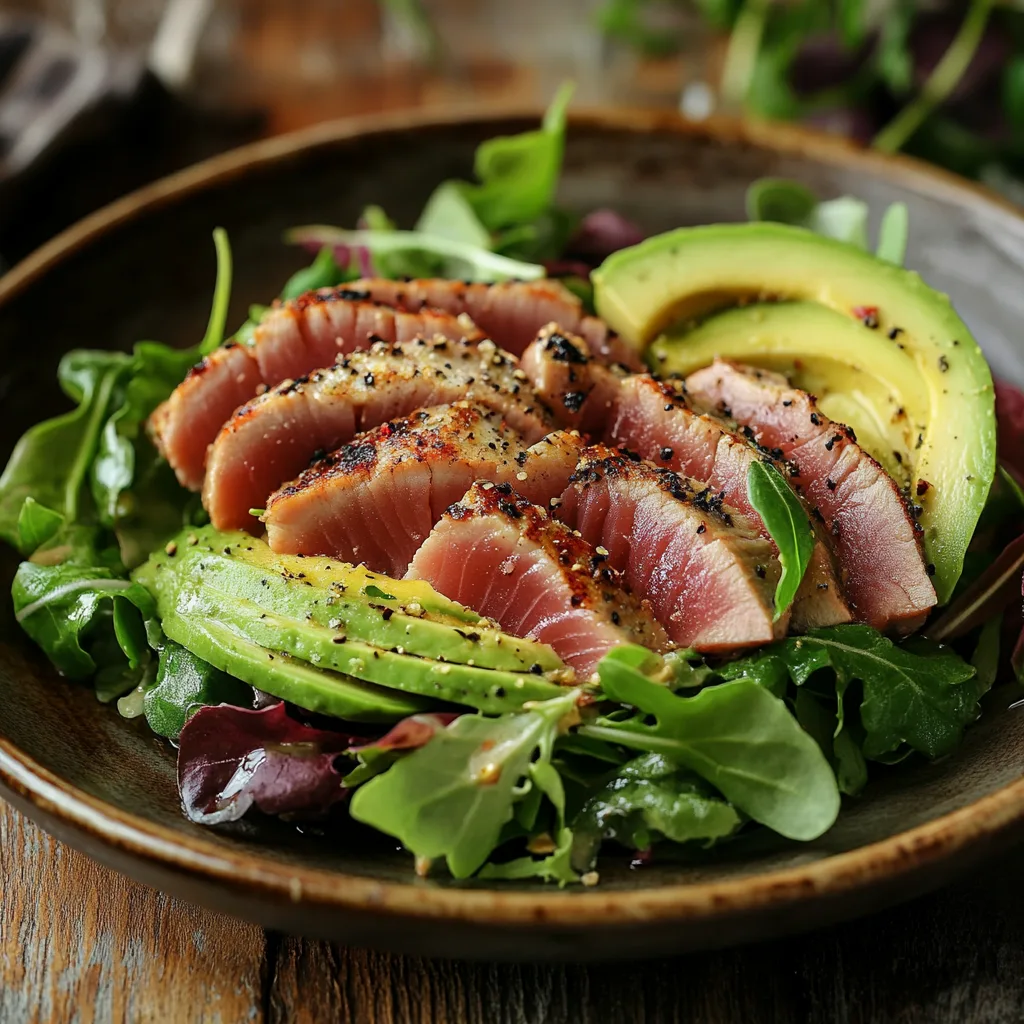
Want to go beyond the basics? Try slicing your seared ahi and serving it over a vibrant salad with mixed greens, avocado, and a light vinaigrette. Another option is to serve it atop some sushi rice with a drizzle of sriracha mayo. Or you can create a deconstructed poke bowl. Get creative, have fun, and make this dish your own. Let your imagination run wild.
Seared Ahi Tuna Variations Around the World
The great thing about food is that it transcends cultures. Let’s take a little tour of some seared tuna variations from around the world.
Japanese Influences: Tataki and Beyond
In Japan, seared tuna is often enjoyed as “tataki,” where the tuna is seared on all sides and then sliced, sometimes served with ponzu sauce and various garnishes. You might also see it in sushi rolls. The Japanese have perfected the art of cooking with simplicity. I love the minimalist approach in preparing tuna in this way.
Mediterranean Twists: Flavors of the Sea
If you’re into Mediterranean flavors, try adding some olive oil, lemon, oregano, and a sprinkle of feta to your seared tuna. These bright and fresh flavors pair perfectly with the richness of the tuna. A dollop of hummus or a side of couscous also pairs wonderfully. You will be transported to the Mediterranean sea with each bite.
Storing and Reheating: Getting the Most Out of Your Tuna
Okay, if you are lucky enough to have some leftovers (which is usually not the case in my house!), we need to talk about how to store and reheat them properly so they taste as good as the first time.
How to Store Leftovers
Store your seared tuna in an airtight container in the refrigerator. It’s best to eat it within 1 to 2 days to ensure freshness and safety. Don’t leave it out at room temperature for too long, because that is a no-no when it comes to fish.
The Best Way to Reheat Seared Tuna
Reheating seared tuna is tricky because it can easily dry out. The best way is to gently warm it in a pan with a touch of oil or broth over low heat. The microwave is also an option but it can dry it out quicker. The goal is to warm it up without overcooking it. You can even try eating it cold as it is still very delicious.
Expanding Your Culinary Horizons Beyond Seared Tuna
While mastering the art of seared ahi tuna is a delicious accomplishment, the culinary world offers endless possibilities for exploration. If you’re looking for exciting side dishes or new cooking adventures, why not consider the crispy perfection of hot fries and explore what hot fries bring to the table in terms of food pairing? For another elegant seafood dish, the ultimate branzino recipe offers a delightful alternative. Or, perhaps you’re ready to try the vibrant and zesty flavors of leche de tigre, a Peruvian citrus marinade perfect for seafood. Finally, if you’re aiming for a plant-based option, kabocha squash recipes offer both simplicity and unique flavors. Exploring these recipes and techniques can help you become a more confident and versatile cook.
FAQs About Seared Ahi Tuna
What is the Best cut of tuna for searing?
The best cuts of tuna for searing are those that are thick and steak-like, usually loin cuts. These have enough heft to sear well without overcooking in the center.
Can I use frozen ahi tuna?
Yes, absolutely! Just make sure you thaw it properly in the refrigerator overnight. High-quality frozen tuna can be as good, or even better, than “fresh” tuna.
How do I know when my tuna is done?
Your seared tuna is ready when you have a nice crust on the outside, and the inside is still pink/red. Aim for a rare to medium-rare center for the best texture and flavor.
Can I sear ahi tuna on the grill?
Yes, you can! Make sure your grill is very hot and well-oiled, and follow the same searing process as you would with a pan. Grilling will give your tuna a smoky flavor, which can be really nice.
Conclusion: Searing Success Awaits You
There you have it, my friend! You’ve now got all the knowledge you need to make the most perfect seared ahi tuna. From choosing the right tuna to cooking it just right, you’ve mastered the art of the pan-seared tuna. This dish, a perfect example of how simple ingredients can create something sophisticated, is healthy and absolutely delicious! So, go ahead, give it a try – you’ll be amazed at how easy it is to create amazing seared tuna recipes at home. You won’t regret diving into the world of cooking seared ahi tuna. Remember, cooking is a journey, not a destination. Have fun exploring, and don’t be afraid to experiment and add your own personal touch to your perfectly seared tuna!
