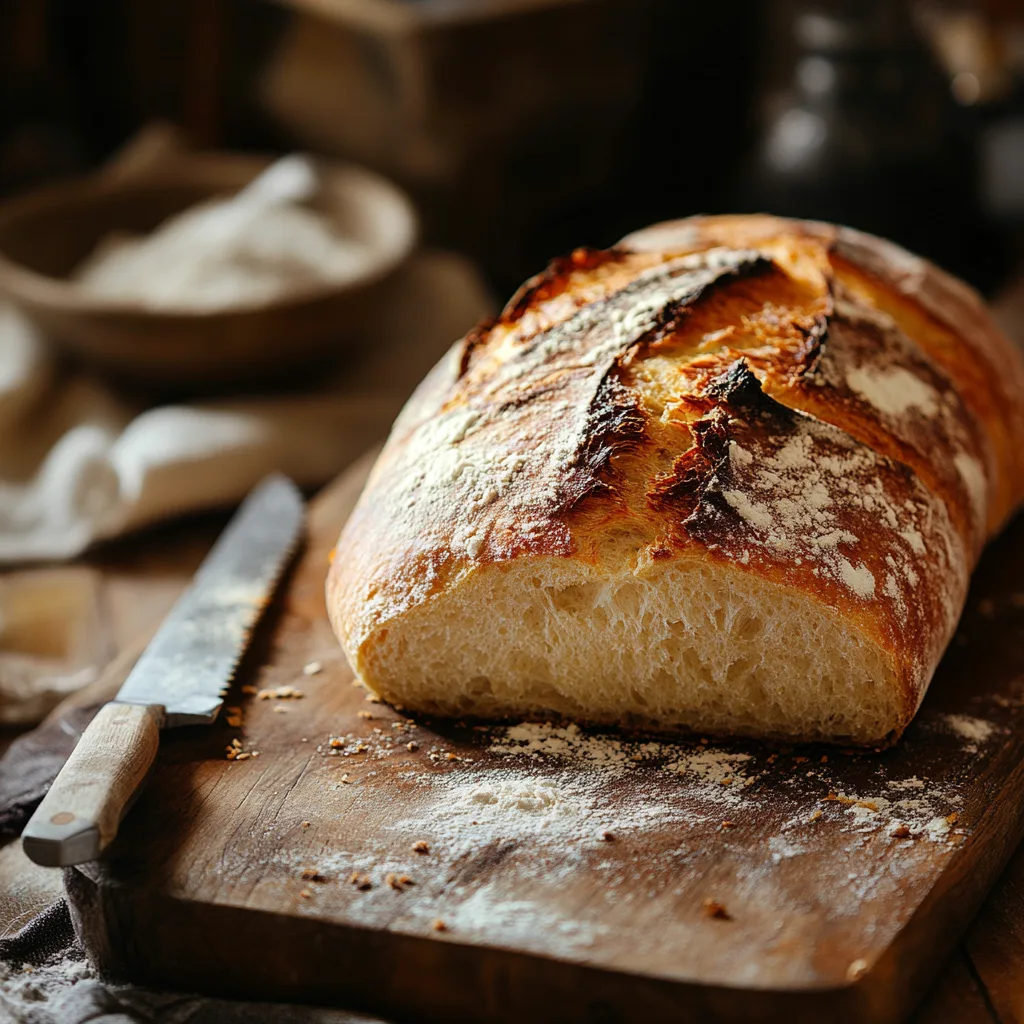
Hey there, bread lovers! Are you ready to embark on a delicious journey to create that perfect crusty Italian bread recipe you’ve always dreamed of? Forget the store-bought stuff – we’re talking about a real crusty Italian bread recipe with a satisfyingly crisp crust and a soft, airy interior. It’s not as complicated as you might think, and trust me, the aroma that fills your kitchen when following this crusty Italian bread recipe is totally worth the effort. I know it might seem intimidating, but with a little guidance and the right techniques, this crusty Italian bread recipe will have you pulling golden loaves from your oven in no time. Let’s get started!
Crusty Italian Bread Recipe: Your Guide to Baking Perfect Loaves at Home
Let’s be honest, we’ve all been there, grabbing a loaf off the shelf and thinking, “It’ll do.” But have you ever really tasted real bread? The kind that makes your eyes close and your taste buds dance? That’s what we’re aiming for.
The Magic of Baking Homemade Crusty Italian Bread
Making bread at home isn’t just about feeding your stomach; it’s an experience. There’s something incredibly satisfying about transforming simple ingredients into something so wholesome and delicious. It’s almost like a bit of magic happening right in your kitchen. You’re not just baking bread; you’re creating a memory, an aroma that brings people together, a piece of comfort. Plus, you control every single ingredient, so no hidden preservatives or additives! What’s better than knowing exactly what goes into your food? Nothing, that’s what!
The Unbeatable Flavor of Freshly Baked Crusty Italian Bread
Let’s talk about flavor, shall we? That deep, nutty, slightly tangy flavor of a freshly baked Italian loaf? Store-bought just can’t compare. The combination of a perfectly crispy crust that crackles when you cut into it, and a soft, chewy interior is simply heavenly. It’s the kind of bread that makes even the simplest of meals feel special. The aroma alone is enough to make anyone’s mouth water. I swear, there’s nothing quite like tearing off a piece of warm, homemade Italian bread and enjoying it with a drizzle of olive oil or a knob of good butter. It’s pure bliss!
Print
The Ultimate Guide to Baking Crusty Italian Bread at Home
- Total Time: 2-6 hours
- Yield: 1 loaf
- Diet: Vegetarian
Description
A comprehensive guide to baking crusty Italian bread at home, focusing on achieving a crisp crust and soft, airy interior. The article covers ingredients, the baking process, troubleshooting common issues, tips for the perfect crust, serving suggestions, and storage methods.
Ingredients
- High-quality bread flour (preferably unbleached)
- Active dry yeast or instant yeast
- Lukewarm water
- Salt
Instructions
- Mixing the Dough: Combine flour and salt in a bowl. In a separate bowl, combine lukewarm water and yeast (activate if using active dry). Mix wet ingredients into dry until a shaggy dough forms.
- Bulk Fermentation: Cover dough and let rest at room temperature for 1.5-4 hours, doing folds every 30 min for the first 2 hours.
- Shaping the Dough: Gently turn the dough onto a floured surface and shape it into a round or oblong.
- Proofing the Dough: Place the shaped dough on parchment paper, dust with flour, cover and let rise for 30-60 minutes.
- Baking: Preheat the oven with a baking stone or Dutch oven to 450°F (230°C). Score the dough, transfer to the hot surface and bake (covered in Dutch oven for 20 mins, then uncovered for another 20-25 mins, or until golden brown and hollow sounding).
- Cooling: Cool completely on a wire rack before slicing.
- Prep Time: 20-30 minutes
- Cook Time: 40-45 minutes
- Category: Bread
- Method: Baking
- Cuisine: Italian
Keywords: Crusty Italian bread, homemade bread, bread recipe, baking, sourdough, bread flour, yeast, dough, bulk fermentation, proofing, crust, gluten
Understanding the Key Ingredients for Perfect Crusty Italian Bread
Before we jump into the recipe, let’s chat about the stars of the show – the ingredients. Each one plays a vital role in creating that incredible crust and airy crumb we’re after. It’s not just about throwing things together; it’s about understanding how each ingredient contributes to the final result.
High-Quality Flour: The Foundation of Crusty Italian Bread
Flour isn’t just flour, especially when it comes to bread making. For an authentic Italian crust, you’ll want to use a good quality bread flour. This has a higher protein content than all-purpose flour, which develops more gluten, giving your bread that lovely chewiness and structure. Think of it as the backbone of your loaf. And while all-purpose might work in a pinch, if you are striving for a really crusty loaf, then you’ll want to reach for the good stuff! You know, a nice bag of bread flour can really make a difference in your final product. If possible, try to find unbleached bread flour, for the best possible results.
Yeast: The Bubbling Life Force
Yeast, my friends, is the magic ingredient that brings your dough to life. It’s what makes your bread rise, creating those air pockets we all love. You can use either active dry yeast or instant (also called rapid-rise) yeast. Active dry yeast needs to be activated by dissolving it in warm water before adding it to your flour, whereas the instant version can be added directly to the flour. Either one will work, just make sure to check the expiration date, as old yeast can sometimes fail to rise properly, leaving you with a sad, dense loaf. It’s alive! Treat it well.
Water: The Hydration Hero
Water is essential for developing gluten in the dough, and the right amount is key to a good loaf. Too little and your dough will be dry and dense, too much and it will be a sticky mess. Lukewarm water is the sweet spot for activating yeast. Avoid using water that’s too hot, as it can kill the yeast. The water is what makes the dough come together, like the glue that holds your project in place. So, choose wisely, and remember that the temperature can make or break the recipe.
Salt: The Flavor Enhancer and Gluten Regulator
Now, don’t you dare forget the salt! It’s not just about flavor; it also controls the yeast activity and strengthens the gluten structure. Without enough salt, your bread could rise too quickly, resulting in a weak loaf. Too much and your dough may not rise at all, you’ll end up with a very un-appetizing bread. It’s like the gatekeeper of your baking endeavors, and can make or break your recipe. So, be sure to measure it correctly for the best possible results.
“Good bread is the most fundamentally satisfying of all foods; and good bread with fresh butter, the greatest of feasts.” – James Beard
The Step-by-Step Process: Your Crusty Italian Bread Recipe

Now that we’ve covered the ingredients, let’s get down to the nitty-gritty: making the actual bread! Don’t worry, I’m going to guide you every step of the way. It’s not about perfection, it’s about the process and enjoying the journey. Ready to get your hands floury? Let’s do this!
Step 1: Mixing the Dough – The “Shaggy Mess” Stage
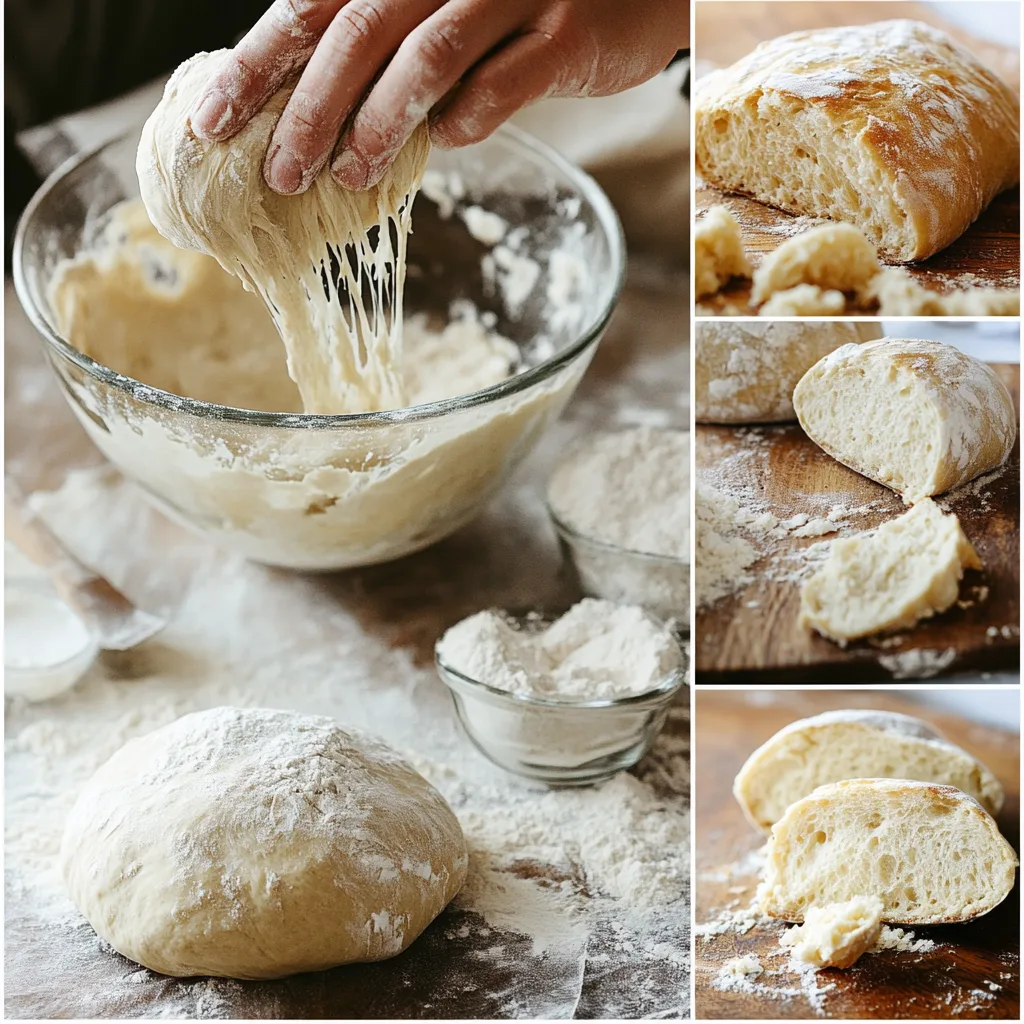
First, in a large bowl, combine your flour and salt. Give them a good whisk to ensure everything is mixed. Then, in a separate bowl, combine your lukewarm water and yeast. If you’re using active dry yeast, let it sit for about 5-10 minutes until it gets nice and bubbly. If using instant yeast, you can add it directly to the flour mixture. Now, slowly pour the water and yeast mixture into the bowl with the flour and salt. Using your hands or a wooden spoon, mix everything until you have a shaggy, somewhat sticky dough. Don’t overmix at this stage. It’s going to look like a hot mess, and that’s perfectly fine! You’re not looking for smooth, you’re looking for just combined. Embrace the shagginess!
Step 2: The Bulk Fermentation: Patience is Key
Cover the bowl with plastic wrap or a damp towel and let it rest at room temperature for at least 1.5 to 2 hours, or even longer (up to 4 hours) depending on the temperature of your kitchen. This crucial step in the crusty Italian bread recipe is known as the bulk fermentation or first rise. During this time, the yeast will be doing its magic, producing gases that will make your dough rise and become light and airy – an essential part of achieving the perfect crusty Italian bread. You can also do a series of ‘folds’ during this time. About 30 minutes after mixing, wet your hand and gently reach under one side of the dough, stretch it out a bit, and then fold it over the dough. Rotate the bowl 90 degrees and repeat until you have come back to where you started. For the best crusty Italian bread recipe results, do this a few times in the first two hours to help develop the gluten and enhance the texture. Patience is absolutely key during this stage. Don’t rush it, and you’ll be rewarded with a much more flavorful loaf that embodies the essence of a crusty Italian bread recipe.
Step 3: Shaping Your Dough: From Blob to Beauty
Once the dough has nearly doubled in size, gently turn it out onto a lightly floured surface. Be careful, it will be quite delicate at this point. We don’t want to tear or flatten our air bubbles that we worked so hard for. Gently shape the dough into a round or oblong shape, depending on your preference. You want to be gentle and work the dough without squeezing it. Think of it as sculpting a cloud. The idea is to create some surface tension, this will help keep its shape in the oven. If you want a more elongated loaf, just gently shape it into an oblong shape. Remember, your hands are your best tools here. The goal here isn’t perfection, it’s creating a shape that looks good to you.
Step 4: Proofing the Dough: The Final Rise
Place your shaped dough on a piece of parchment paper. This will make transferring the loaf to the oven much easier later on. Lightly dust the top with flour, this will help give us that authentic crusty look. Cover the dough with plastic wrap or a clean kitchen towel and let it proof (or rise) for another 30 to 60 minutes. The warmer your kitchen the faster it’ll proof. During this time, the loaf will rise again and become even fluffier. This final rise is critical for a light and airy bread, so don’t skip it. This is the final chance for the yeast to work its magic, so make sure it’s in a cozy, warm place.
Step 5: Baking to Golden Perfection: The Crust is Calling
Preheat your oven to 450°F (230°C) with a baking stone or baking sheet inside for at least 30 minutes. If you have a Dutch oven, now is the time to preheat it with the lid on as well. The hot surface is essential for creating that beautiful crust. Once the oven is hot, carefully remove the dough from its resting place. Score the top of the dough with a sharp knife or lame. This not only looks pretty but also controls the direction of the rise during baking. Then, gently place the parchment paper with the dough onto the hot baking stone or into the preheated Dutch oven. If using a Dutch oven, cover the pot with the lid and bake for 20 minutes. Then remove the lid and bake for another 20-25 minutes, or until the loaf is deeply golden brown and sounds hollow when tapped on the bottom. The internal temperature should reach around 200°F (93°C). Remove the bread and place it on a cooling rack to cool completely before slicing. Don’t be tempted to cut into it while it’s still warm, you need to give it a chance to rest and firm up a little more. This is the most challenging, because the smell is so amazing.
“The smell of good bread baking, like the sound of lightly flowing water, is indescribable in its evocation of innocence and delight.” – M.F.K. Fisher
Troubleshooting Common Crusty Italian Bread Problems
Okay, so you’ve followed the recipe, you’ve been patient, and yet… sometimes things don’t go quite as planned. It happens to the best of us! Don’t despair. Baking bread is a learning process, and it’s totally normal to encounter a few bumps along the way. Let’s take a look at some of the most common issues and how to fix them. It’s all part of the fun, right?
Problem 1: The Dreaded Dense Loaf
A dense loaf can be a real bummer. It’s when your bread is heavy, compact, and lacks that light, airy texture we’re all after. There are a few reasons why this might happen. First, your yeast might not have been active enough. Double-check the expiration date, and make sure you’re using warm water that’s not too hot to activate it. Also, make sure you have properly measured your ingredients. If you didn’t use enough yeast or if your proofing time was too short, your dough won’t rise properly. Another possible cause is that you didn’t develop enough gluten. In the next batch, make sure you mix the dough well and do some folds during the bulk fermentation. Over-proofing, believe it or not, can also lead to dense bread. If your dough rises too much, it can collapse during baking. Pay close attention to the dough’s behavior and adjust your timings accordingly.
Problem 2: A Pale, Uninspiring Crust
A pale crust is like a cloudy day; it just lacks that golden, tempting appeal. The main culprit here is usually a low oven temperature. Make sure your oven is truly hot before baking, and don’t open the door too often while baking. This can cause the temperature to drop. Another thing to consider is the amount of steam in your oven, we’ll talk about that later. Steam helps create a good crust. You could also try increasing the baking time by 5 to 10 minutes. If you notice the top is getting too dark, you could try turning down the heat a little or covering it loosely with foil during the last part of baking. A little extra baking time is often all it takes to get that color just right.
Problem 3: Flat, Lifeless Bread
A flat loaf is no fun, it’s sad and lacks that lovely rise we are expecting. This usually means your dough wasn’t strong enough. Over-proofing can lead to this issue as well. If your dough goes past it’s prime rising, it won’t have the necessary spring to puff up in the oven. Under-proofing is another possible cause. If the dough isn’t ready when it’s put into the oven, it will lack structure. Also, the gluten may not be fully developed. Make sure to mix the dough sufficiently, and do those folds during bulk fermentation. Make sure you haven’t added any extra liquid to the dough. You want to stick with the recipe. And always, always make sure your yeast is active and ready to work.
Problem 4: The Soggy Bottom Syndrome
Oh, the dreaded soggy bottom! This happens when the bread doesn’t bake properly on the bottom. This often occurs if the bottom of your oven is not hot enough, or if the bottom of the bread is not exposed to enough heat. Make sure to preheat your baking stone or baking sheet for a good amount of time before putting the dough in. Using parchment paper helps for easy transfer, but be sure it’s placed directly on the baking stone or sheet. Don’t use an old flimsy baking sheet; it doesn’t get hot enough. And if you are using a Dutch oven make sure you remove the lid for the last 20 to 25 minutes to get a crispy bottom.
Tips for Achieving the Perfect Crust
Now that we’ve talked about the problems, let’s focus on the positive – achieving that glorious crust! Here are a few extra tips to help you master the art of the crust.
The Power of Steam: Your Secret Weapon
Steam is a real game-changer for crusty bread. It keeps the surface of the dough moist at the beginning of the bake, which allows it to expand fully before the crust sets. You can create steam by placing a hot, oven-safe pan on the bottom shelf of your oven and pouring a cup of hot water into it when you put the bread in. Be super careful and wear oven gloves so you don’t burn yourself. Alternatively, you can use a Dutch oven which creates its own steam environment when covered. The steam makes such a big difference in the final crust, it really is like magic.
The Importance of a Hot Oven
A hot oven is absolutely crucial for a good crust. Make sure your oven is preheated thoroughly, for at least 30 minutes at 450°F (230°C). This ensures the bread starts baking immediately and develops a proper crust. A hot oven gives you that rapid expansion that results in a crispy exterior. Don’t underestimate this, it is essential. If your oven is not hot enough, the bread will spread too much and you’ll end up with a flat loaf.
The Scoring Technique: Unleashing the Inner Artist
Scoring is not just for aesthetics; it also controls how the bread expands in the oven. Using a sharp knife or lame, make a few slashes in the surface of the dough just before baking. This allows the gases to escape in a controlled manner, preventing the loaf from cracking randomly. Plus, it looks pretty cool! Be confident with your scoring; deep, clean cuts will give you the best results. It’s like adding the finishing touch to a masterpiece.
“If you have good thoughts they will shine out of your face like sunbeams and you will always look lovely.” – Roald Dahl
Serving Suggestions: Enjoying Your Freshly Baked Bread

You’ve baked this beautiful loaf – now what? The possibilities are endless, but here are some of my favorite ways to enjoy that crusty goodness. Freshly baked Italian bread is a star on its own, but it also pairs wonderfully with a variety of dishes. Let’s explore some delicious options!
Classic Pairings: From Bruschetta to Sandwiches
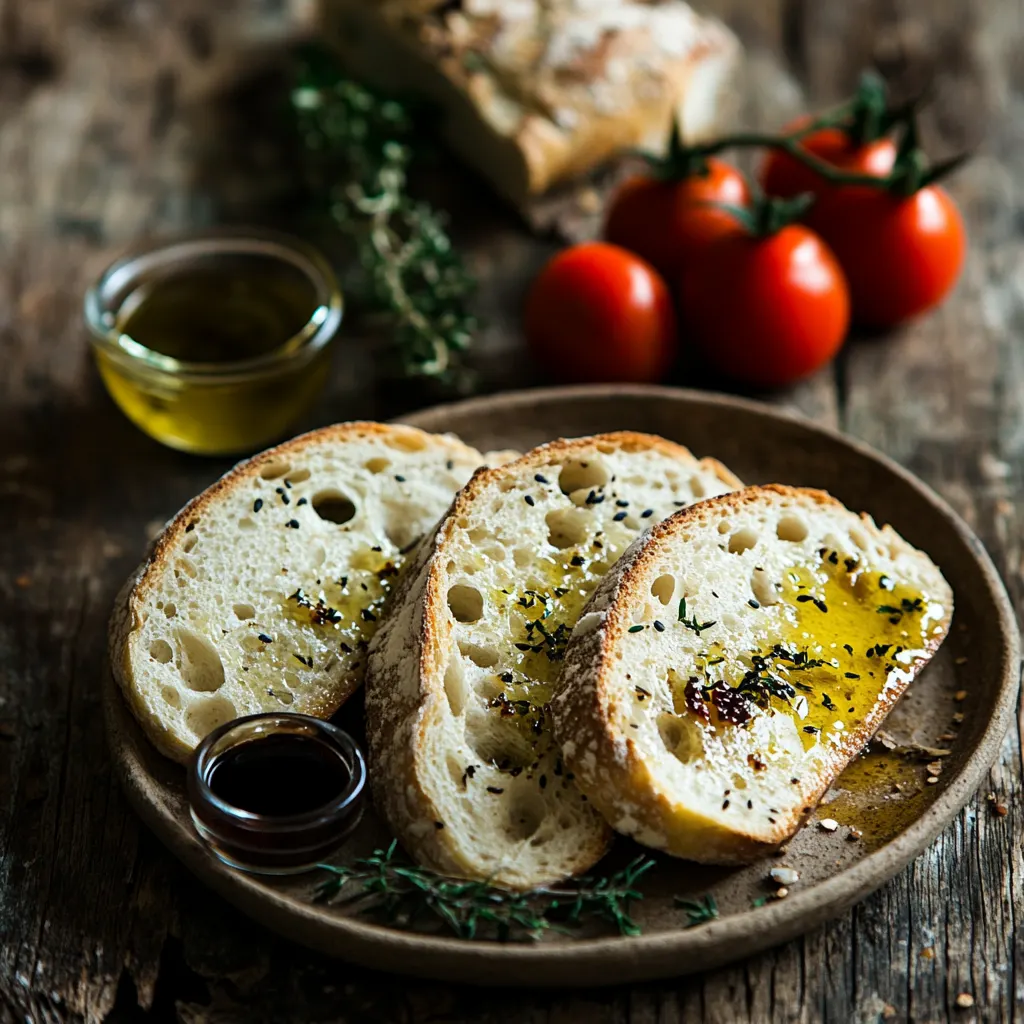
First off, a classic is always a great option: Bruschetta. Slice your warm bread, rub it with a clove of garlic, drizzle with olive oil, and top with fresh tomatoes, basil, and a sprinkle of salt. It’s simple, yet elegant. And what about a good sandwich? Italian bread makes the best sandwich base! Try it with cured meats, cheeses, or roasted vegetables for an unforgettable meal. And for a quick snack, just a slice with some butter or olive oil is always amazing. Don’t underestimate the simple pleasures of life!
Beyond the Basics: Creative Ways to Enjoy Your Bread
Want to get a bit more creative? Use your crusty Italian bread for croutons in salads or soups, it’ll elevate any dish. You can also cube it up and bake it with herbs and olive oil for a delicious side dish. It’s also amazing as a base for a simple panzanella salad. Or tear some pieces and dip in fondue. The versatility of crusty Italian bread is truly amazing! Get creative and have fun experimenting.
Storing Your Homemade Italian Bread: Keeping it Fresh
So, you’ve baked a beautiful loaf, and now you want to keep it fresh for as long as possible? Here are some tips.
Best Practices for Long-Lasting Freshness
Once your bread has cooled completely, store it in a paper bag or loosely wrapped in a kitchen towel at room temperature. Avoid using plastic bags, as they can trap moisture and make the crust soggy. If you plan to keep it for a couple of days, you can wrap it in a paper bag and then place it inside a plastic bag to keep it from drying out. If you won’t be eating it within a few days, you can slice it and freeze it. When you’re ready to eat, just pop the frozen slices directly into the toaster or oven to reheat. Bread is best enjoyed fresh, but these methods will help keep your loaf delicious for as long as possible.
Conclusion: The Joy of Baking Your Own Crusty Italian Bread
Baking crusty Italian bread at home is more than just making food; it’s a rewarding experience that brings a lot of joy. From the simple act of mixing flour and water to the heavenly aroma filling your kitchen, it’s a journey worth taking. Yes, there might be a few challenges along the way, but the satisfaction of pulling out a beautiful, crusty loaf from your oven is absolutely priceless. So, go ahead, give it a try, and enjoy the delicious results. Happy baking!
Beyond the Bread: Exploring Italian and Complementary Flavors
Once you’ve mastered the art of crusty Italian bread, the culinary world opens up even further! This delicious bread isn’t just for enjoying on its own; it’s the perfect accompaniment to a wide array of dishes. Consider using your fresh loaf to soak up the rich, flavorful sauce in a bowl of Sensational Italian Drunken Noodles. For a lighter option, try pairing it with a creative twist on a classic like Avocado Toast with a French twist. If you’re in the mood for more Italian flavors, you might want to explore some flavorful Italian Eggplant Recipes, perhaps using toasted bread slices as a base. And while they might not be traditionally Italian, you might find yourself reaching for some perfectly fried and salty goodness alongside your bread, discovering What are the Positives About Hot Fries? or pondering What Does Hot Fries Do For Food? As you can see, the possibilities are endless when you have a fresh, homemade loaf of crusty Italian bread!
Frequently Asked Questions About Crusty Italian Bread
Q: What is the secret of crusty bread?
A: The secret to crusty bread lies in a combination of factors: a high oven temperature, sufficient steam during the initial part of baking, proper gluten development, and allowing the bread to cool completely before slicing.
Q: What is the crunchy Italian bread called?
A: While there isn’t one specific name for “crunchy Italian bread,” it’s often referred to as pane italiano or Italian-style bread. The term ciabatta is often used, but is more specifically a flat, elongated, and very airy type of Italian bread.
Q: How do I get a crispy crust on my bread?
A: To get a crispy crust, use a very hot oven, create steam in the initial part of baking, and make sure to use the right scoring technique. Also, bake it long enough to get it properly golden brown.
Q: What is the best flour to use for Italian bread?
A: Bread flour is the best choice for Italian bread due to its high protein content, which helps to develop the gluten needed for a chewy texture and a good rise. Unbleached bread flour is preferred for the best results.
